The cold months, usually reserved for seed catalogues and muddy boots by the back door, turned into a quiet laboratory. Between hot dishes in tins and overflowing recycling bins, a simple idea emerged: what if the answer to summer drought was already sitting in the kitchen, about to be thrown out?
From heatwaves to hosepipe guilt: why watering has become a headache
Summer gardening has started to feel like a risky game. Temperatures climb, the soil cracks, leaves flop in the midday sun, and the water meter spins faster than you’d like.
Across Europe and North America, hosepipe bans and watering restrictions are now regular news. Gardeners watch cherished beds collapse in a few days of heat. One generous evening of watering can mean puddles on the surface and still-dry roots underneath. One missed day can mean shrivelled tomatoes and brown hydrangeas.
Every watering choice now feels like a trade-off between saving plants and saving water.
Traditional watering tools fall short
The classic lineup is familiar: a can, a spray gun on a hose, maybe a porous pipe snaking between rows. They all work, up to a point, but they demand time and constant presence. They also rely heavily on judgement, which is hard to keep consistent after a long day at work.
On hot days, surface watering often evaporates before reaching the deep root zone where plants actually drink. Overwatering encourages shallow roots and fungal disease. Underwatering sends plants into survival mode, dropping flowers and fruit. Many gardeners walk away from an evening session still unsure they’ve got it right.
The unexpected hero in the recycling bin
The turning point came not in the shed but at the kitchen sink. A tin of beans emptied into a saucepan, the familiar clink of metal in the recycling tub, and then a pause. The can was rinsed, solid, watertight, and destined to be crushed and melted. Did it really need to leave the house so quickly?
Why tins feel like pure rubbish
For most of us, food cans are the definition of disposable. We open them, rinse them, and send them off for someone else to deal with. We rarely look beyond the label.
Yet that dull metal cylinder is strong, doesn’t rot, and is naturally waterproof. In engineering terms, it’s a ready-made mini reservoir. It just never occurs to us to treat it as one.
➡️ U.S. Navy completes first Los Angeles-class fast attack submarine refueling overhaul
➡️ Ornithologists repeat it every year: this simple winter task can save baby birds
➡️ A new maker of passenger jets arrives: it’s not Chinese but Indian
➡️ These major cities are sinking: why their disappearance now looks inevitable
➡️ UK and Australia deploy Typhoons and F-35 fighters to U.S. for Red Flag 26 combat training
➡️ Aluminium foil in the freezer: a foolproof trick more and more people are using
A bare metal cylinder with hidden potential
Peel off the label, scrub off the grease, and a can becomes anonymous. No branding, no recipe, no hint of beans or soup. Just a plain shell that can be repurposed for almost anything.
Seen differently, a food tin is less “waste” and more a prefabricated water tank waiting for a role.
That simple shift in perspective led to an experiment: turning a discarded can into a gravity-fed, plant-level watering device that works while you’re doing something else.
How the improvised self-watering system works
The principle is straightforward: store a small amount of water underground, next to the roots, and let it escape slowly through tiny holes. The soil drinks at its own pace, and evaporation at the surface stays low.
The basic kit you need
Almost everything comes from a normal household toolbox and recycling pile. For one self-watering unit you’ll need:
- 1 clean, empty tin can (400–800 g size works well)
- 1 hammer
- 1 sturdy nail or screw
- Protective gloves to avoid sharp edges
The method takes just a few minutes per can, once you’ve done the first one.
Making the “dripper” at the bottom
Turn the can upside down. Wearing gloves, hold the nail against the base and tap gently with the hammer. Make five to ten small holes, roughly spread out across the bottom.
Fewer, smaller holes mean a slow, steady release. More or larger holes create a faster flow, better for thirsty crops or very sandy soil. You can adjust each can to suit a particular plant, bed or pot.
The size and number of holes turn a simple can into a personalised irrigation valve.
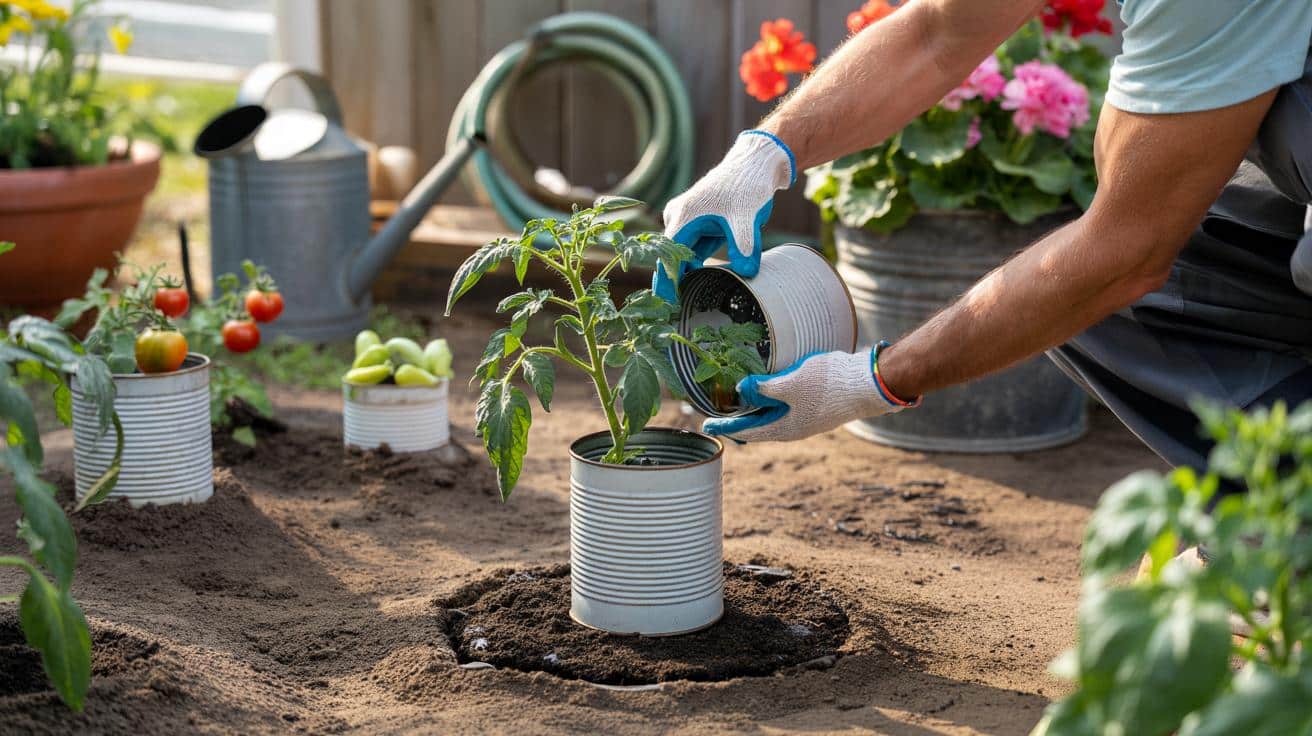
Positioning the buried reservoir
Next to the plant you want to protect, dig a narrow hole about 15 to 25 centimetres from the stem. The aim is to sit the can upright, holes down, with the open top just above or level with the soil surface.
Backfill around the sides so the can is held firmly in place. When you water, you pour straight into the can. The water trickles out from underneath and spreads slowly through the root zone, instead of racing off across the surface.
What happens once the can is underground
The first few days can look uneventful from above. The real action is hidden, where roots and soil meet.
Slow, consistent moisture rather than boom and bust
Instead of big floods every few evenings, plants receive a gentle, almost continuous supply beneath the surface. The soil stays evenly damp instead of swinging between bone-dry and waterlogged.
Depending on the can size, hole diameter and soil type, one fill can keep a plant supplied for two to three days, sometimes longer if there’s mulch on top.
Early signs in the plants
Gardeners who try this often notice small changes first: leaves that no longer droop at midday, flowers that hold on a bit longer, fewer split tomatoes after heavy rain.
Stable moisture helps plants invest in deeper, stronger roots and steadier growth.
Because the water goes where it’s needed, there’s less surface crusting and fewer weeds triggered by wet topsoil. Adding organic mulch around the can increases the effect, forming a lid that slows evaporation even further.
Waste less, grow more: the double dividend
Reusing cans this way doesn’t just keep a few pieces of metal out of the recycling stream. It also shifts how water and money move through the garden.
Upcycling instead of buying plastic
Commercial drip systems and buried cones often come in plastic, with connectors and hoses that eventually crack or end up in landfill. A reused tin is already made, already paid for, and fully recyclable again if you ever stop using it.
The cost per unit is essentially zero. That opens the door to scaling the idea across an entire vegetable patch or a row of shrubs without a big outlay.
Water use where it counts
Traditional overhead watering can send significant amounts of water into the air, especially in hot wind. With buried cans, much of that loss disappears. More of each litre goes into plant tissue and fruit rather than the atmosphere.
| Watering method | Main losses | Root-zone efficiency |
|---|---|---|
| Sprinkler / spray gun | Evaporation, wind drift, runoff | Low to moderate |
| Surface hose / can | Evaporation, runoff on hard soil | Moderate |
| Buried can reservoir | Limited lateral seepage | High, concentrated near roots |
In areas where tariffs rise with consumption, even a modest reduction in outdoor use can make the summer bill less painful.
Garden gossip: from raised eyebrows to quiet converts
A row of tins half-hidden in soil can look odd to anyone peering over the fence. At first glance, it resembles accidental littering rather than a thought-out system.
Questions start: “Why are there baked bean cans buried in your tomatoes?” Then comes the informal trial phase. A neighbour borrows the idea. Another tweaks the hole size. Someone tries it in a patio tub for a holiday week and comes back to surprisingly perky geraniums.
Once a few plants survive a heatwave thanks to buried cans, scepticism tends to fade.
This shared tinkering turns a scrap-metal hack into a sort of local, evolving technology. Each garden becomes a mini test site, feeding tips and adjustments back into the next attempt.
What this simple trick reveals about resilient gardening
Behind the metal and the holes lies a broader message. Garden resilience often grows from modest, practical ideas rather than high-tech gadgets.
Experimenting as a gardening habit
Trying a few cans in different beds is low risk. If one position fails or the holes clog, you can pull the can up, adjust it and start again. This encourages a mindset where mistakes are just data, not disasters.
Once that mindset takes hold, other questions emerge: which household containers could shelter seedlings? Which kitchen scraps make the best mulches? The garden turns into a workshop for small-scale climate adaptation.
Points to watch and ways to adapt
Like any system, buried cans have limits and quirks:
- Rust and safety: tins will corrode over time. Check for sharp edges before handling and replace them if they disintegrate.
- Soil type: in heavy clay, water may spread slowly, so fewer holes might work best. In sandy soil, you may need larger cans or more units per square metre.
- Root competition: in beds with very dense planting, one can may not be enough. Larger thirsty plants, such as courgettes or peppers, can each have their own reservoir.
- Clogging: sediment or roots can block holes over time. Gently twisting and lifting the can at the end of the season helps keep it working.
For balcony gardeners, the same principle adapts easily. Small tins can be sunk into large containers or planter boxes, reducing the risk of coming home to dried-out soil after a weekend away.
The idea also pairs well with other low-tech techniques. Mulch reduces evaporation from above. Shade cloth limits stress on the hottest days. Rainwater stored in barrels can be funnelled into the cans, cutting mains use even further. Layered together, these simple measures help gardens cope better with erratic weather while keeping costs, and waste, remarkably low.